Setup Wizard
For an easier setup, the use of the setup wizard is recommended. This will guide you through all the necessary settings.
Setup
The first step is about the basic settings of the Report Pack.
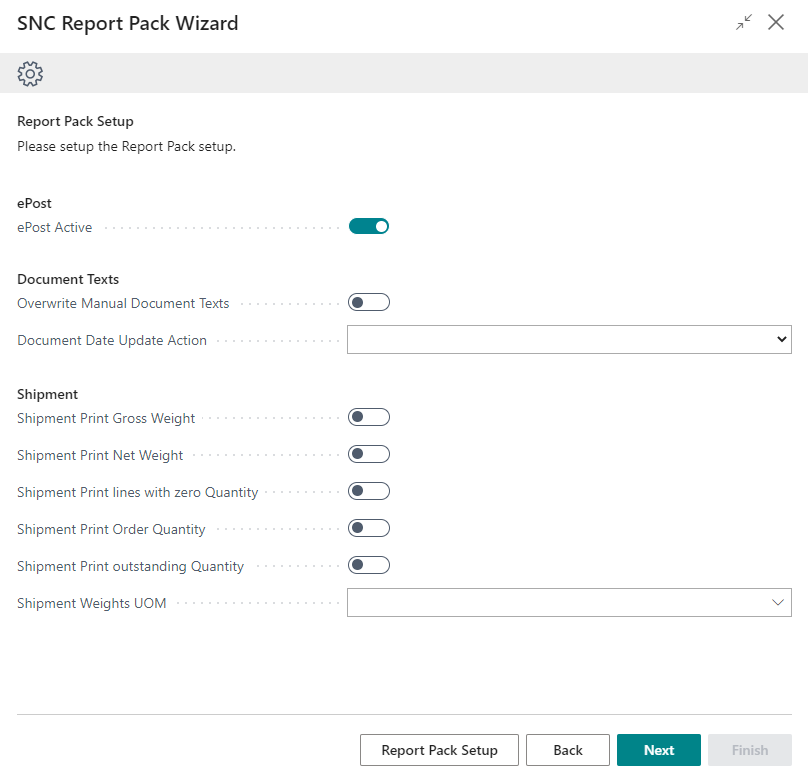
The following options are available:
ePost
- ePost Active: With this option you can activate or deactivate the ePost function. The effect of activation is that the ePost layout is enabled for all vendors and customers.
Document Texts
- Overwrite Manual Document Texts: Allows you to specify whether manual document texts should be overwritten when the Insert document texts action is used. You can find more information about this in the section Report Text Setup.
- Document Date Update Action: Depending on the settings, it is possible that document texts are dependent on certain dates or time periods. If the date of a document is subsequently changed, it may be necessary to adjust the document text accordingly. With this setting you can determine what should happen to the voucher texts when the date is updated. You have three options here:
- empty: No action after date change
- Automatic: The document texts will be overwritten automatically without the need for confirmation
- Confirm: The user must confirm after a date change that the document texts are adjusted
Hinweis
If you change the order date in an order, only the document texts for the order confirmation are adjusted. If you want to change the document texts of the delivery bill and invoice, you must adjust the posting date.
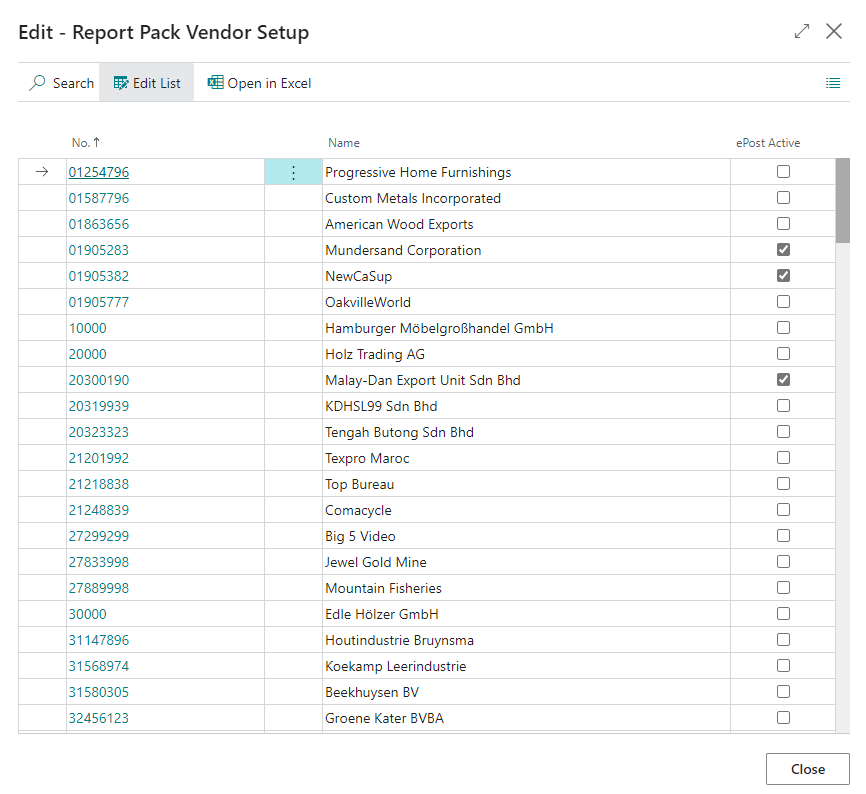
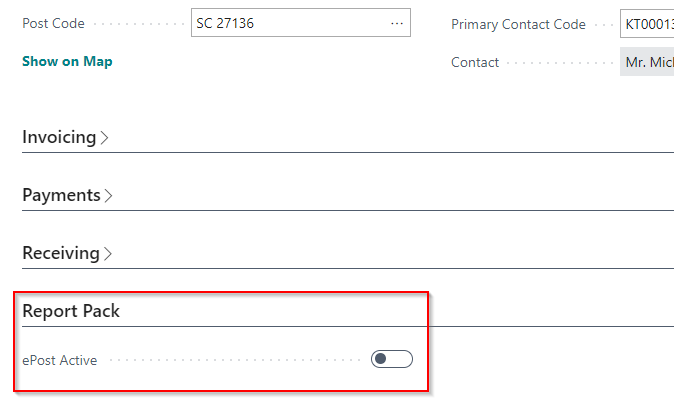
Vendors and Customers setup
In this setup step, you can decide whether ePost should be activated or not, depending on the customer and vendor. As a result of ePost activation, the layouts of the reports are adapted to the ePost format. You can also change this setting afterwards on the respective vendor and customer cards.
Shipment
- Shipment Print Gross Weight
- Shipment Print Net Weight
- Shipment Print lines with zero Quantity
- Shipment Print Order Quantity
- Shipment Print outstanding Quantity
- Shipment Weights UOM
With these options you can set which additional information should be printed on the delivery bills.
Report Selection
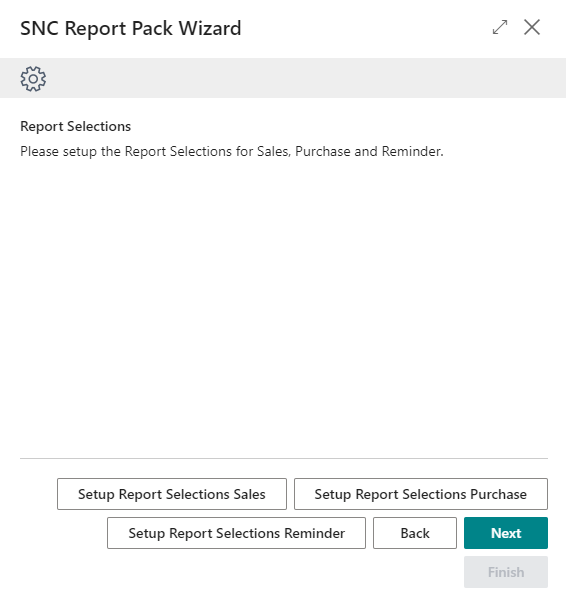
This step is about assigning the reports to be used. For example, you can set that you want to use the sales order confirmations of the Report Pack, but for purchase invoices the Business Central standard is used.

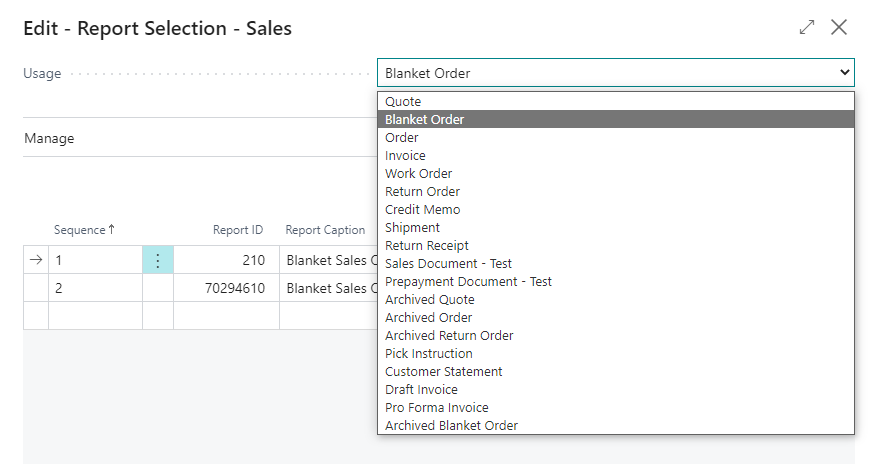
You can select a report with the selection menu in the upper right corner. The table below will then display the associated reports.
Hinweis
This is a page of the BC standard. For this reason, reports that are not supported by the Report Pack are also displayed.
In the table you will find the reports available for this document. If there is a report from the Report Pack for the document, you will find in the table not only the standard BC report (in this case with ID 210), but also a second report with the same name. All reports provided by the Report Pack have an 8-digit report ID starting with 702.
To use the Report Pack report for the respective document, either swap the order of the two reports or simply delete the standard BC report from the table.
Report Pack reports can be used for the following documents:
Sales
- Quote
- Blanket Order
- Order
- Invoice
- Credit Memo
- Shipment
Purchase
- Quote
- Blanket Order
- Order
- Return Order
- Return Shipment
Once you have completed the report setup, you have reached the end of the setup wizard. Now the reports can be used.
Reminder
- Reminder
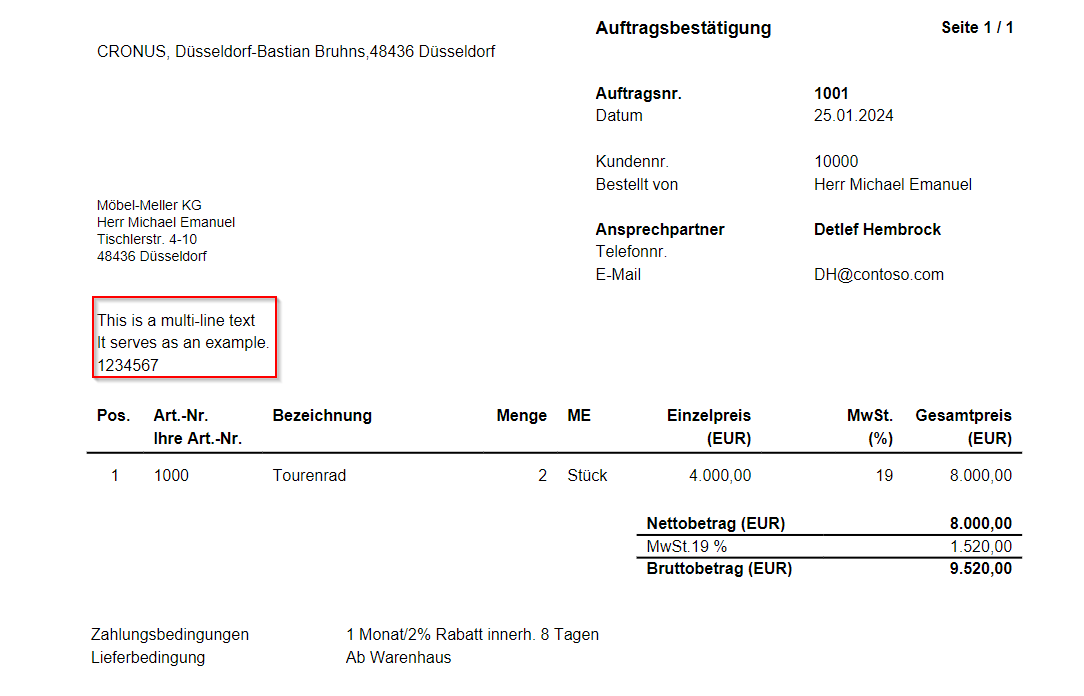
Document Text Groups and Report Texts
The document texts and document text groups are set up at this point.

Document Text Groups
In order to be able to assign document texts to several customers or vendors, you have the option here to create groups. To do this, open the respective view of the document text groups and create a new group via New.
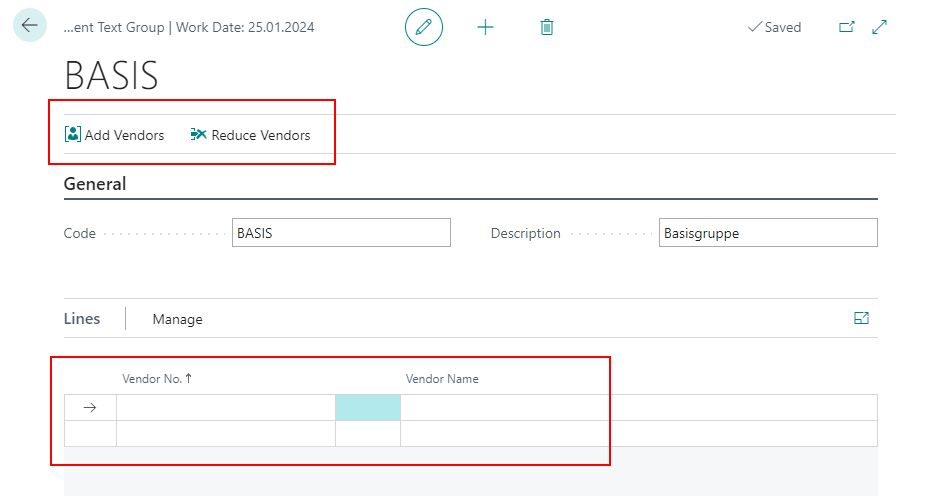
After you have given the groups a code and a description, you add vendors or customers. You have two options to do this:
- Adding and reducing vendors/customers via filter on the menu bar
- Manually adding the vendors/customers directly via the rows.
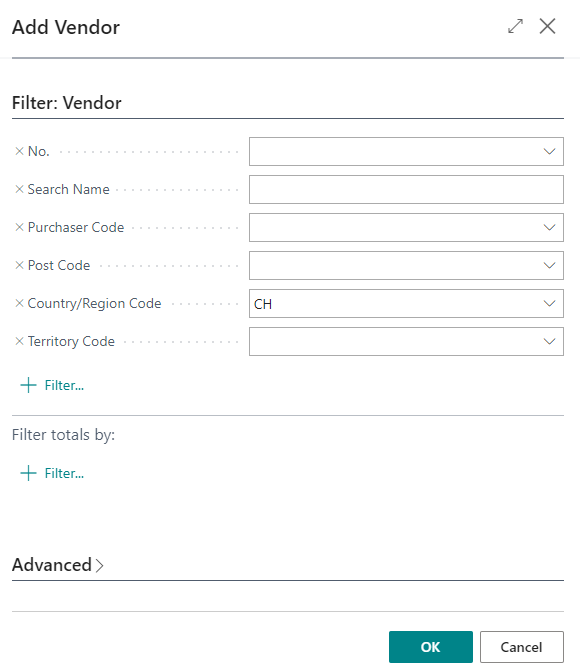
The former allows you to add any amount of vendors and customers to this group. For example, selecting all vendors with the country code CH will automatically add all Swiss vendors in the database.
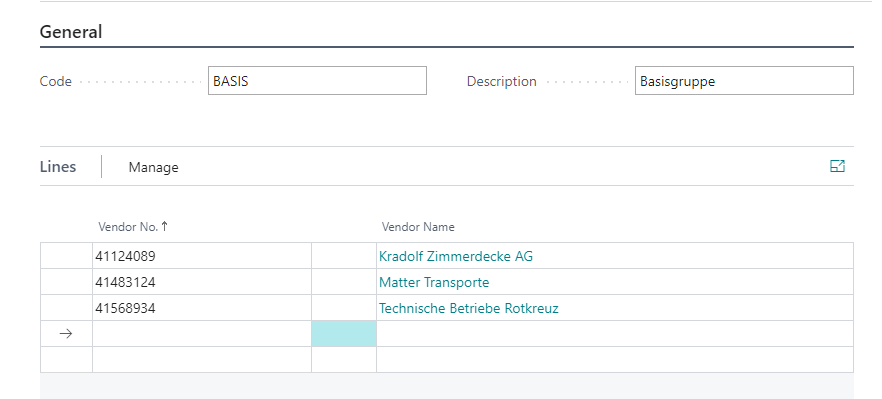
Removing the vendors/customers works analogously via the Reduce button in the menu bar.
How to assign document texts to these groups is described in the Report Text Setup.
Report Text Setup
The document texts are set up at this point. If you want to set up document texts, open the setup via Setup Report Pack Texts.
Hinweis
If you want to change something in the document texts afterwards, you can also call the Setup Report Pack Texts directly via Business Central search.
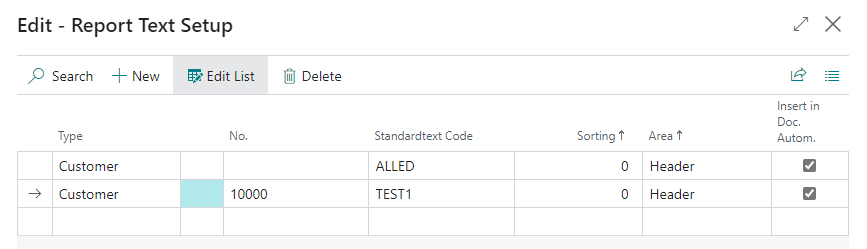
Now you will see a table where you can store document text settings. There are the following columns:
- Type: Specify whether the document text should be used for customers, vendors, or groups of customers or vendors.
- No.: Here you select for which customer, vendor or group the document text should be.
- Standardtext Code: Specify here which document text you want to use. You can find more about this below this list.
- Sorting: Here you can specify where this document text should be located in relation to others.
- Area: Specify whether the document text should be in the header or footer area.
- Insert in Doc. Autom.: Activate this option if you want the document text to be automatically inserted into documents.
Hinweis
If you want to insert document texts manually, please read section Manual Document Texts.
To create the actual document text, you need to create a new Standard Text. To do this, click in a Standard Text Code field and select New.
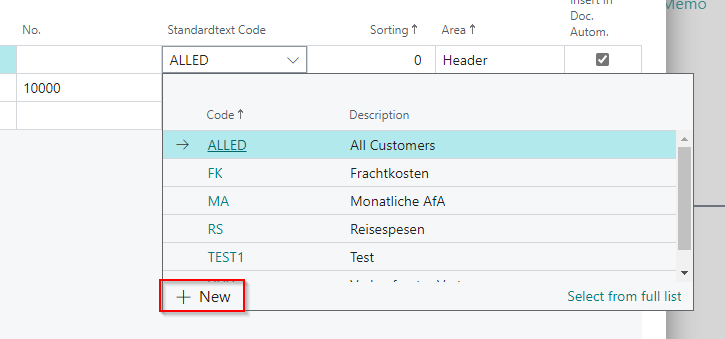
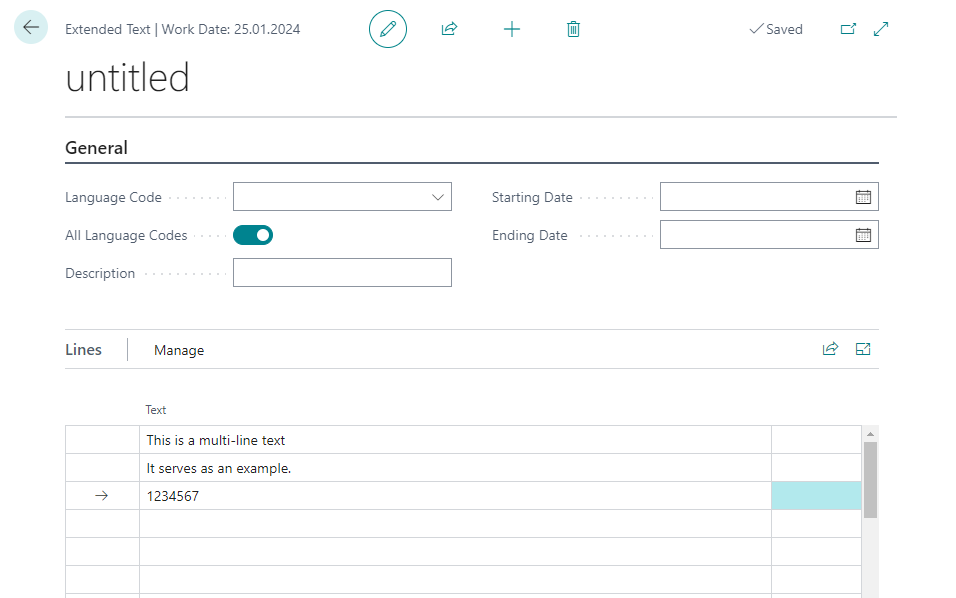
Then enter the desired code and a description in an empty line. Now while you still have selected the line you can open the Extended Texts page. This is a page of the BC standard.
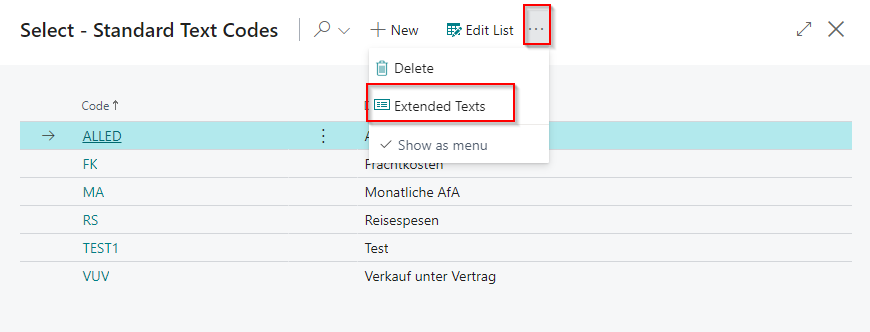
In this view you create a new text block.
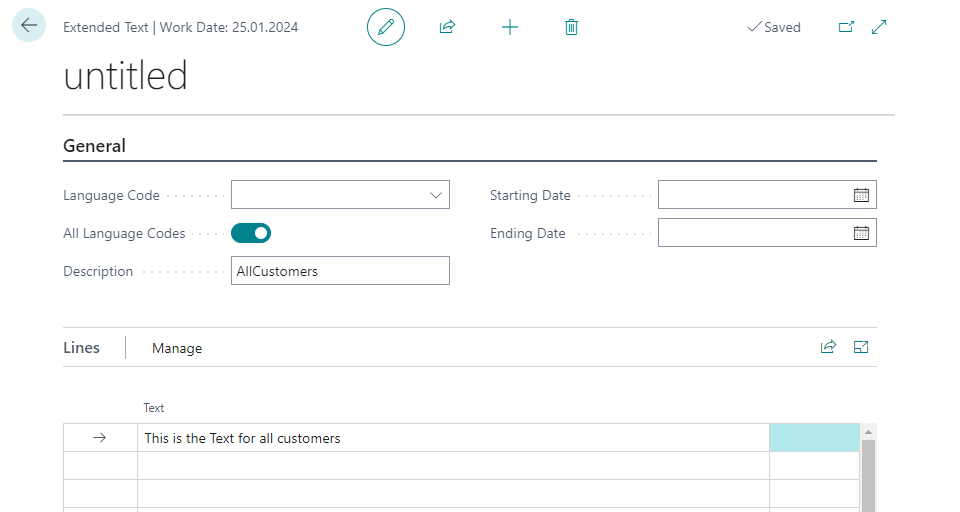
This is where the actual document text and its properties are defined.
- Language Code: Specify the language of the document text here.
- All Language Codes: If no specific language is to be used, enable this option.
- Description: Here you can enter a description.
- Starting Date and Ending Date: In these fields you can set a time period when the document text should be activated. For example, you could create a document text for Christmas greetings that should only be used from 12/01 to 12/23.
In the lower area you can enter the document text line by line.
If you scroll down further on the page, you will find the three sections Sales, Purchases and Service. Here you can select in which reports the text module should be printed.
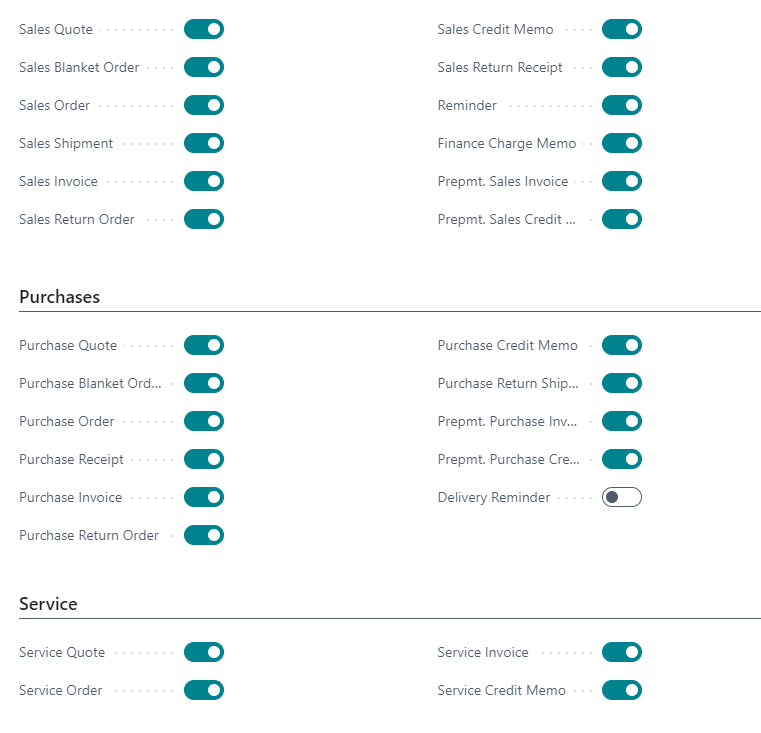
Hinweis
Please note that some documents that are listed here are not supported by the SIEVERS Report Pack, as this is the BC standard. A list of supported reports can be found in the section Report Selection.
This way you can enter any document texts you want. When you are done, close the windows until you have reopened the setup wizard.