Service Setup
Depending on which Business Central system is involved, more or fewer setup steps have to be performed. This is because the service cannot simply access a Business Central system in the cloud. Preparations are required for this, such as registering the service in the Azure Portal. If it is a cloud system, all the following setup steps are necessary:
- Set up the ME application in Azure Portal
- Enable ME application in Business Central
- Create and configure service on prem
In the case of an on prem system, you only need to perform step 3.
Set up the ME application in Azure Portal
To use the service with a Business Central SaaS, it must be registered and set up on Azure beforehand.
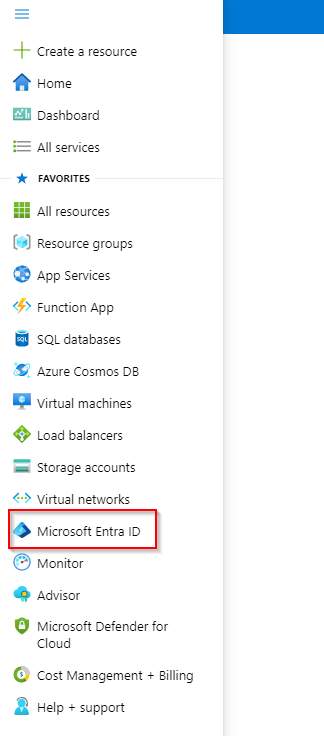
To do this, open the portal.azure.com page and log in with the correct tenant. In the menu you will find the item Microsoft Entra ID.
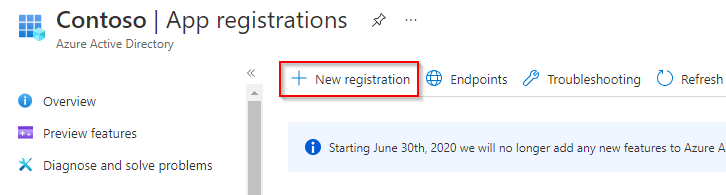
Here you can register new apps in the App registrations section. Create a new app registration with New registration.

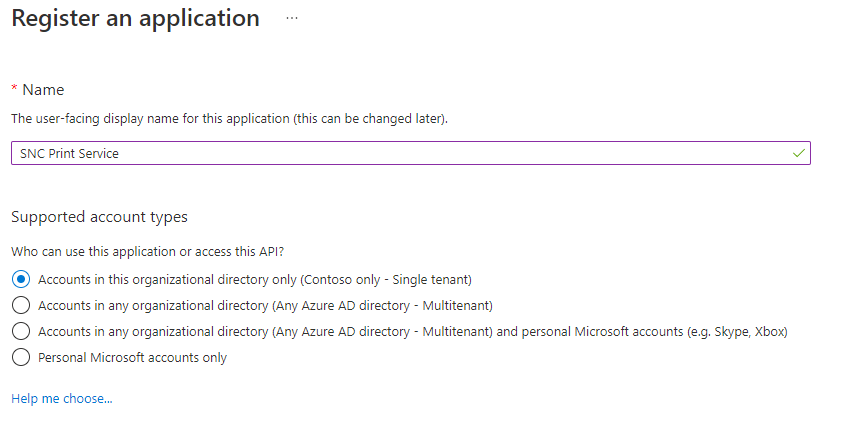
Give the app a name, for example SIEVERS Print Service. Also make sure that in the Supported account types section, the first option Accounts in this organizational directory only is selected. Now click on 'Register'.
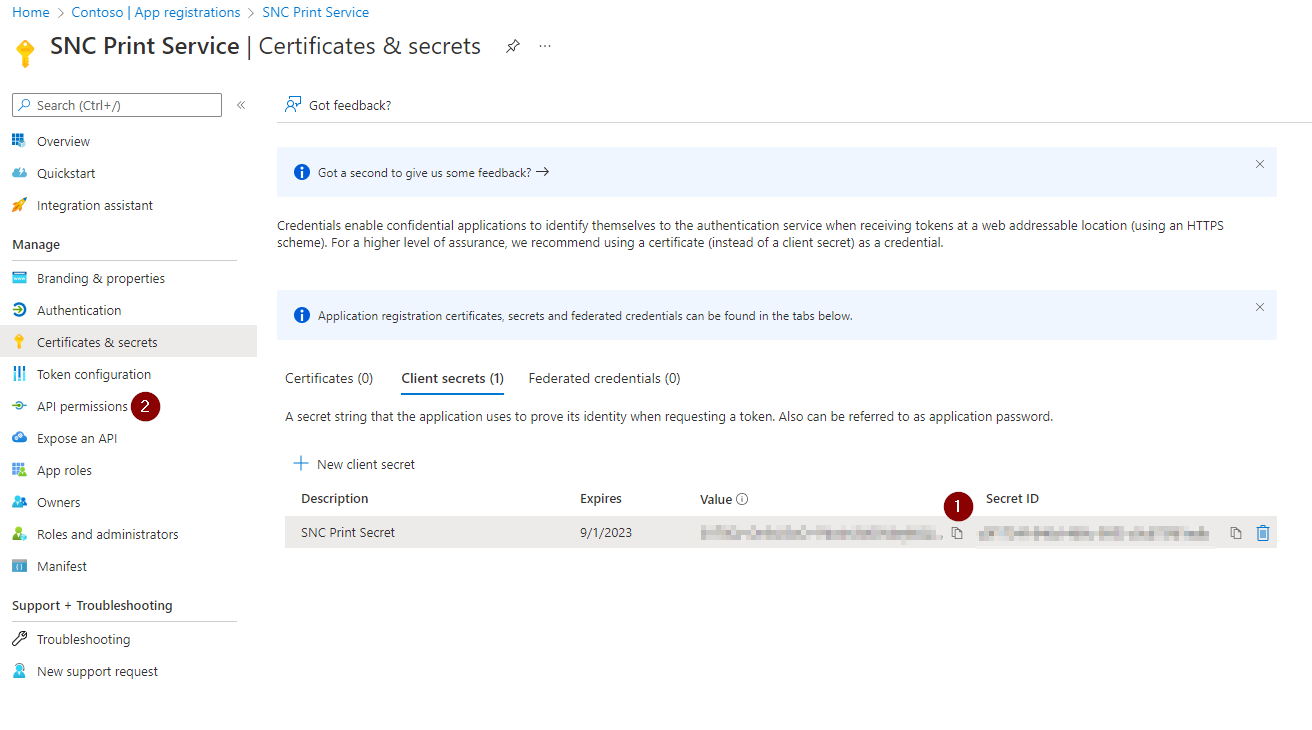
After registration, some important data is displayed. Save the Application ID and the Directory/Tenant ID separately. You will need them later. Then add a Client Secret with Add a certificate or secret. This is necessary for the creation of credentials.

Click on New client secret

You can enter any name for the description. Then add a date on which the secret should expire.
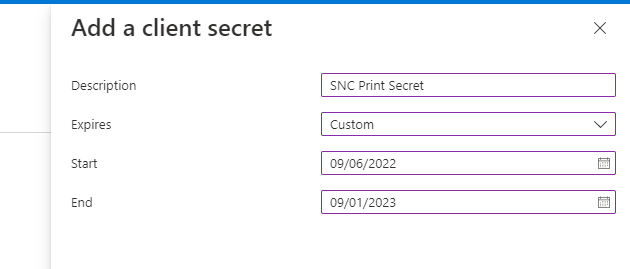
::: Attention After you have created the Secret, you must copy the Secret-Value immediately and save it separately. Copying is only possible when the value is displayed for the first time. :::
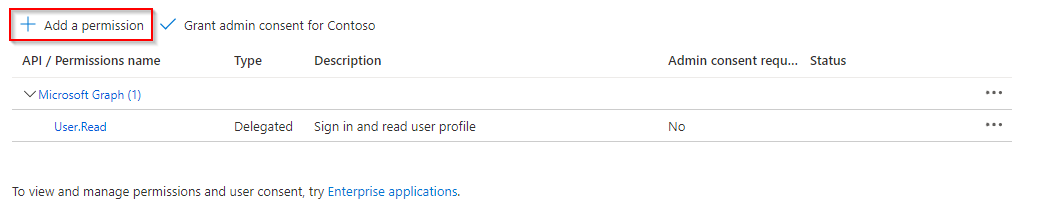
Then switch to the API Permissions menu.
In the API Permissions, the service must now be authorized to receive data from the Business Central API. To do this, add a new permission with Add a permission.
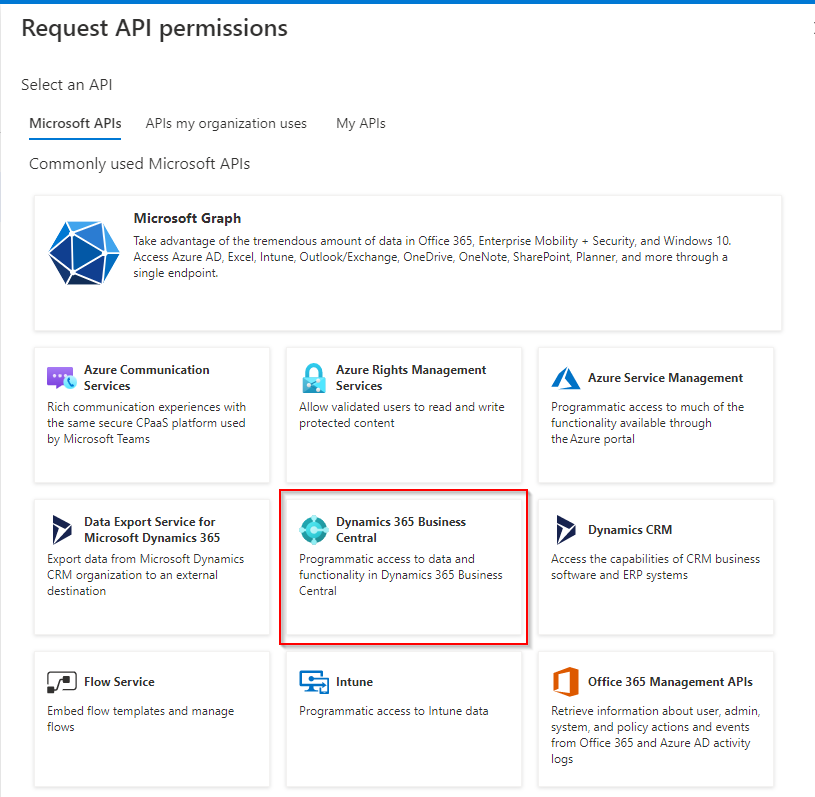
Then you need to select for which API you want to assign the permission.
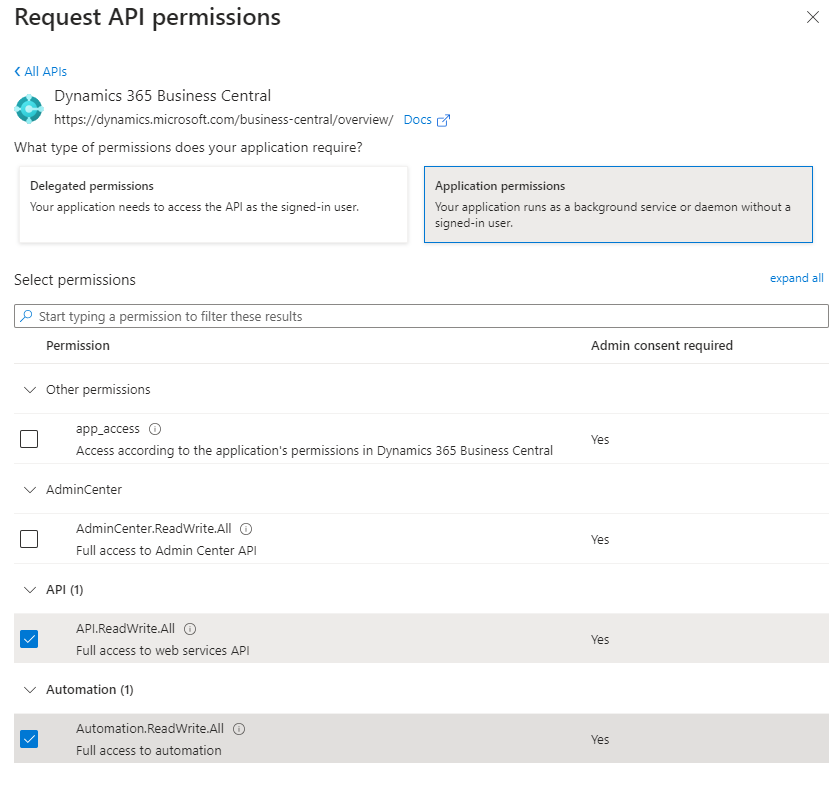
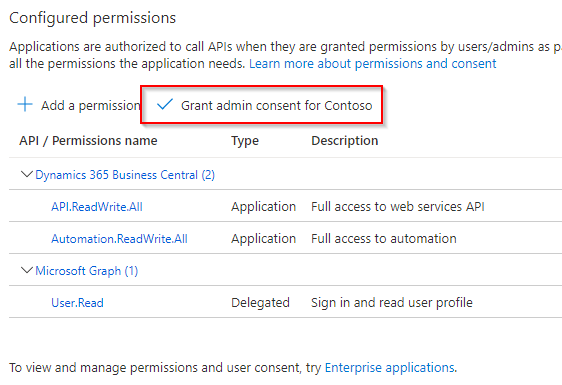
Now the authorization is configured. It is an application authorization. In addition, the service should be able to read as well as write. Therefore set the permissions as shown in the following screenshot.
After you save the permission, the permission still needs to be granted admin consent. To do this, select Grant admin consent for Contoso.
Now only the authentication of the service must be enabled. To do this, open the Authentication page via the menu.
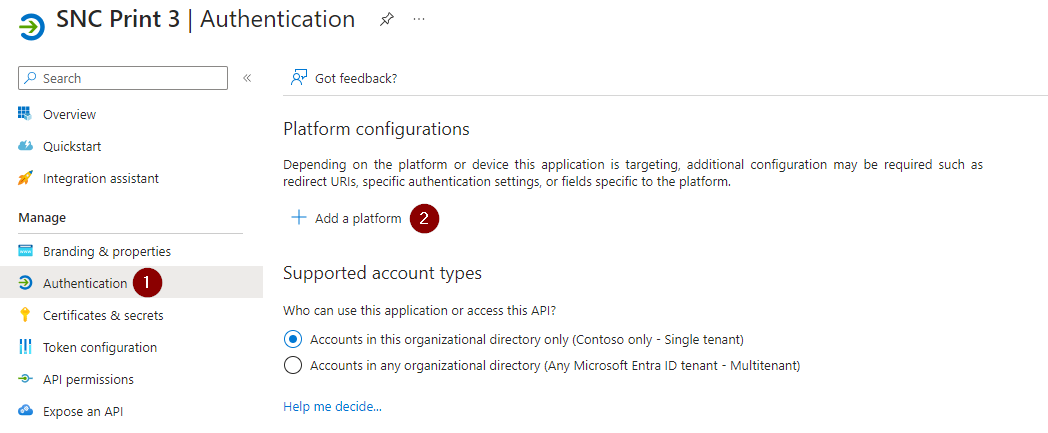
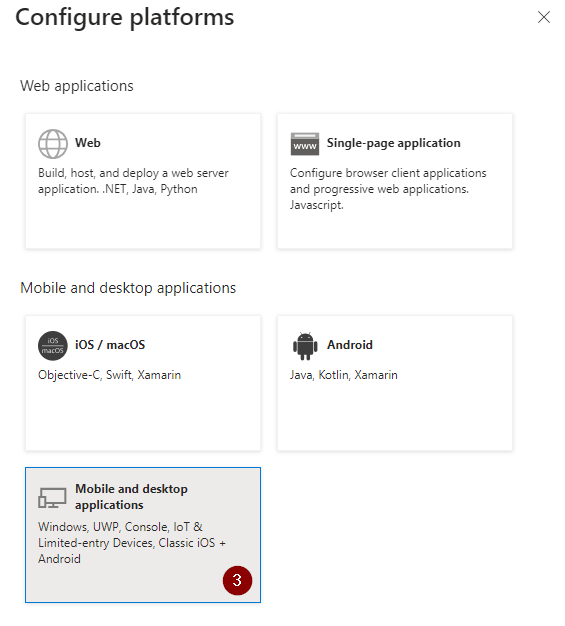
Add a Mobile and desktop applications configuration via Add platform.
In this configuration, set up the redirect URI to
https://businesscentral.dynamics.com/OAuthLanding.htm
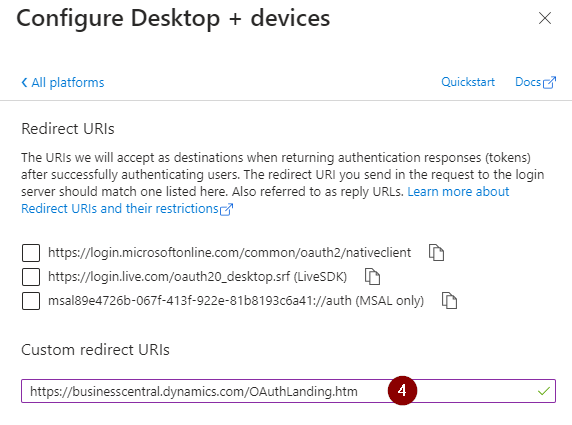
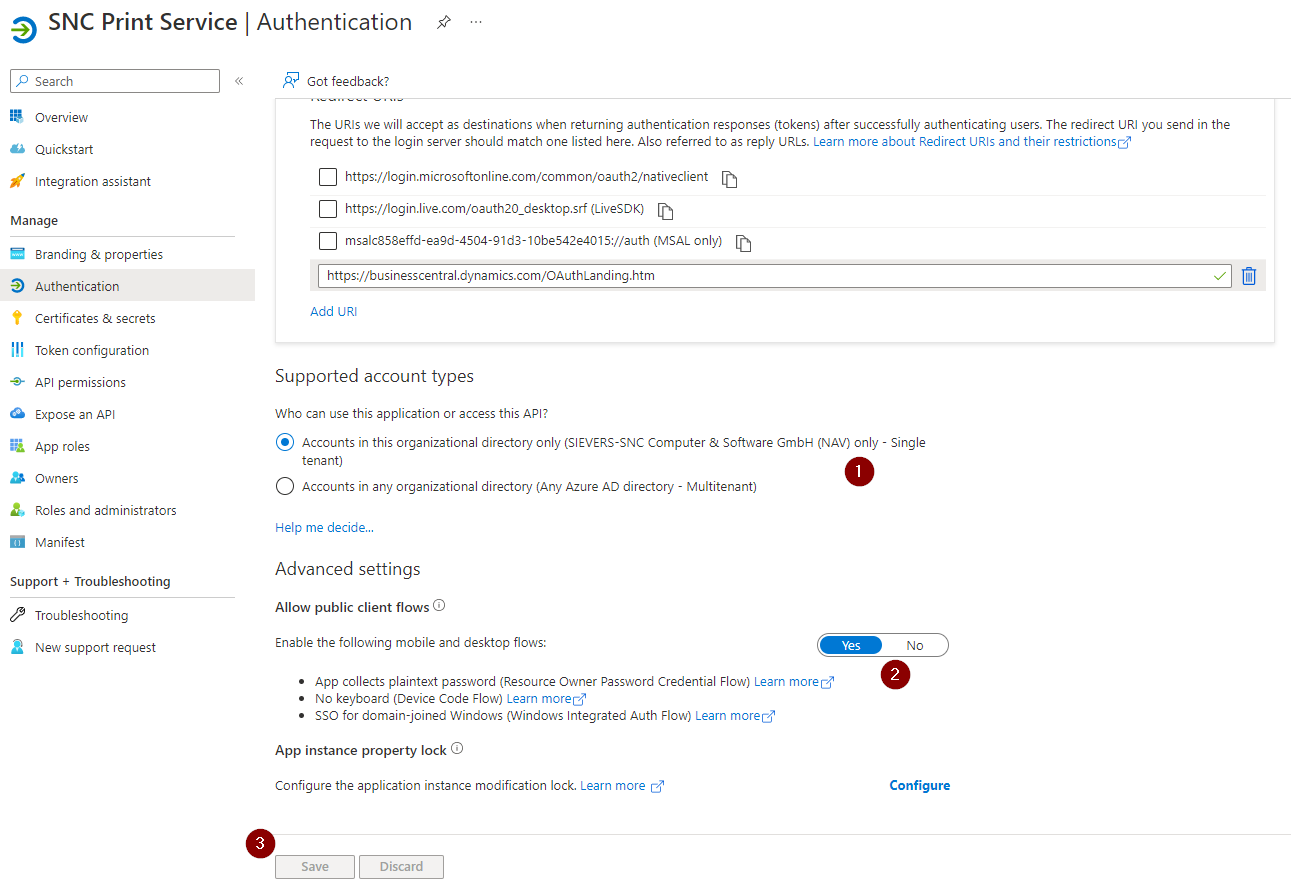
Set the Allow public client flows option to Yes.
The Business Central tenant is now ready to use the SIEVERS Print Service.
Enable ME Application in Business Central
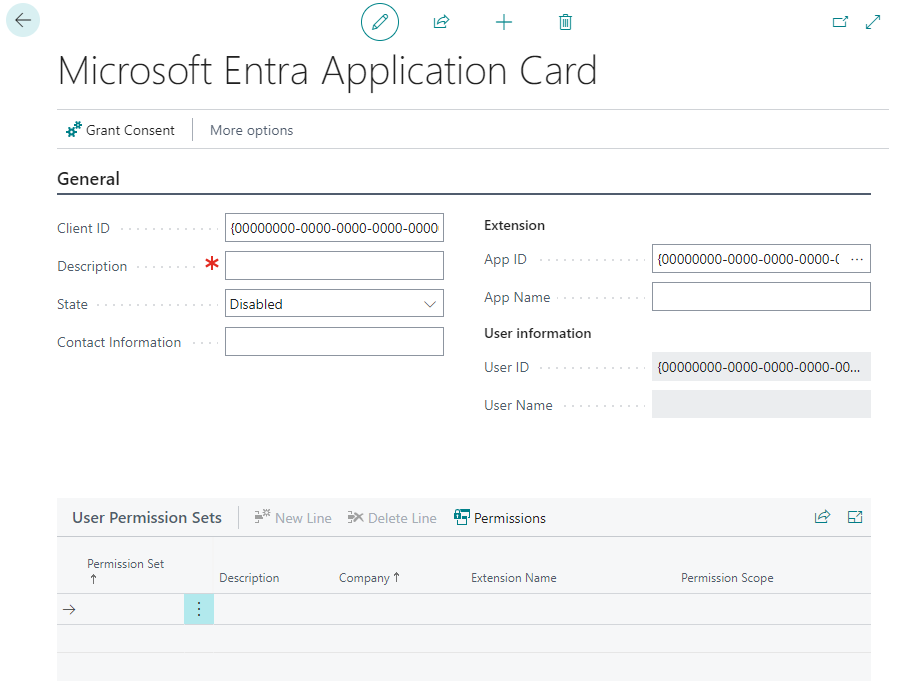
In Business Central, open the Microsoft Entra Applications page and create a new client.
At this point, an ID that you created when setting up the service in Azure comes into play. Enter the client ID in the first field, add a description and switch the State to enabled.
Then assign the user permission sets D365 FULL ACCESS and SIEVERS PRINT to the service.
Create and configure service on prem
To send the print jobs from BC to the printer, the transfer by a computer is necessary. The printer must either be connected directly to the computer or be on the same network. In short: the computer must be able to reach the printer. The supplied SIEVERSPrintService will run on this computer. The following sections describe how to set this up.
In the last step of the setup wizard you should have downloaded the Deliverable. This is the service to be installed - currently still in .zip format.
Unpack the .zip file. In the unpacked folder, open the SetupWizard.exe. This will start the setup wizard of the print service.
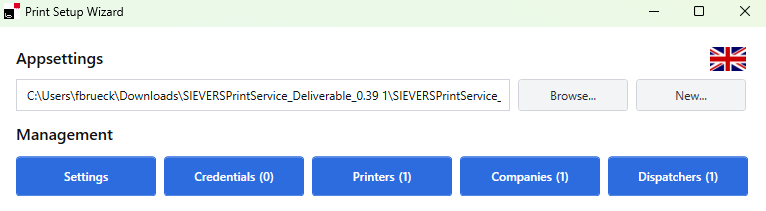
Here are the following fields:
- Appsettings: Defines the Appsettings of the print service. You can usually leave this path as is. If you want to run multiple print services side by side - for example, if you have a test system next to the regular system - you can also change the path or create a new one.
- Settings: See Settings
- Credentials: See Credentials
- Printers: See Printers
- Companies: See Companies
- Services: See Services
Settings
These are settings for the behavior of the SIEVERS Print Service.
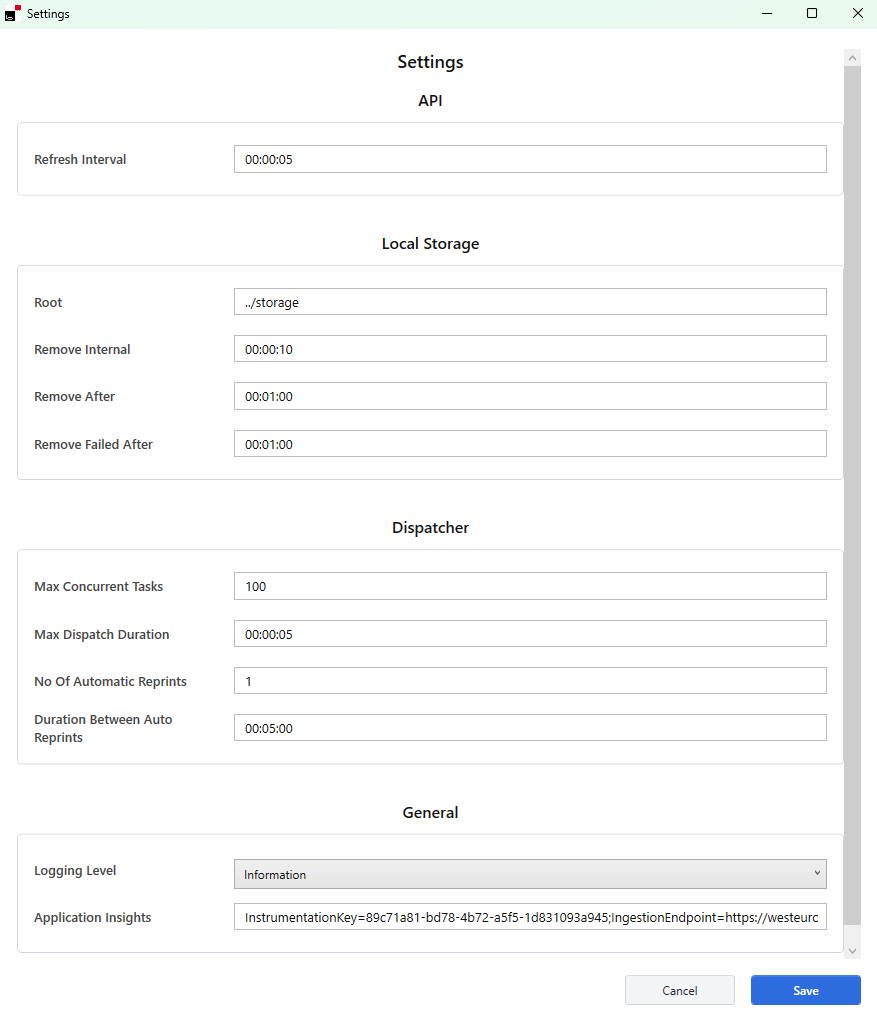
Here you can, for example, set how often new documents should be retrieved from Business Central or whether and how often the dispatcher should retry sending the print job.
Credentials
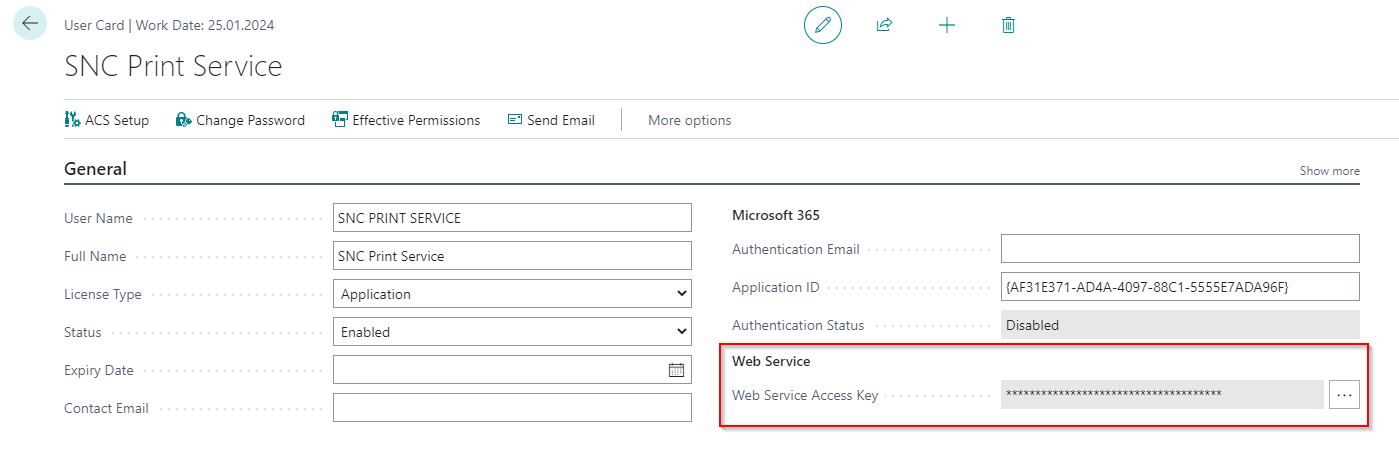
This is the data that the service uses to authenticate with Business Central. Create new credentials with Add. The key element here is the Authentication Type. This determines what other information you need. In the case of AAD, you need the Azure Application ID and the Client Secret. You noted both when you performed Set up the ME application in Azure Portal. For Basic authentication, you need a username of a BC user and the Web Service Access Key. You can find this in the user card (see screenshot below)
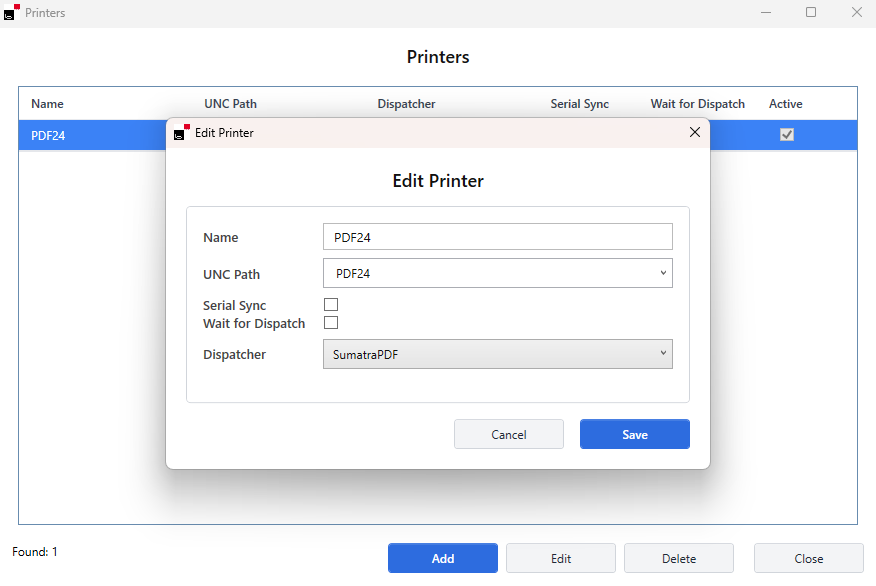
Printers
Create a new printer here by clicking Add. Give the printer a name and select a printer connected to your computer in the UNC Path field. Then select the dispatcher. This is normally SumatraPDF. The dispatcher is responsible for sending the PDF files to the printer.
The behavior can be configured in three scenarios using the Serial Sync. and Wait for Dispatch fields:
- Scenario 1 – Serial Sync.: off / Wait for Dispatch: off: Print jobs are forwarded directly to the printer.
- Scenario 2 – Serial Sync.: on / Wait for Dispatch: off: Print jobs are written to a queue and processed asynchronously. The order of creation is strictly maintained.
- Scenario 3 – Serial Sync.: on / Wait for Dispatch: on: Print jobs are written to a queue and processed asynchronously. The dispatcher script waits for the physical start of the print job (first page) before the next job is initialized. Wait for Dispatch enforces Serial Sync Mode regardless of its individual setting – it therefore cannot be active without Serial Sync. being enabled.
Warnung
Wait for Dispatch can only be used with UNC paths/printer names without spaces.
When Wait for Dispatch is active, the dispatch process takes correspondingly longer. In this case, increase the Max Dispatch Duration (under Settings) accordingly to prevent the print job from being aborted prematurely with an error. Use the normal dispatch duration of the respective printer as a reference.
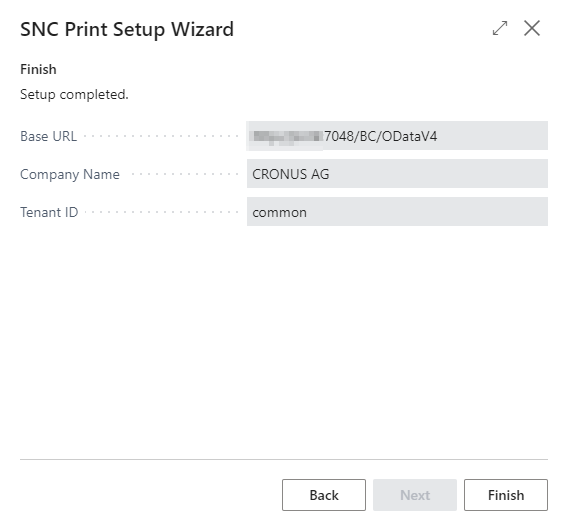
Companies
Here you enter the connection to your Business Central tenant. You received this at the end of the Business Central setup wizard.
- Azure Tenant ID = Tenant ID
- Company = Company name
- Credentials: Select the credentials you just created
- Base URL = Base URL
Assigned Printers
Here, the printers created in Business Central during setup are assigned to the printers just created locally in the service. To do this, enter the name of the printer created in Business Central in the BC Printer field and select the appropriate local printer in the right column.
Services
The Services section is used to manage the SIEVERS Print Windows background services installed on the computer. The list shows all registered services with their Service name, Startup type and current Status (e.g. Running or Stopped).
The following actions are available:
- New...: Creates a new Windows background service. A new appsettings file is selected and the service is registered under the name SIEVERS Print Service n+1.
- Delete: Removes the selected service.
- Start: Starts the selected service.
- Stop: Stops the selected service.
- Restart: Restarts the selected service.
Hinweis
To use the service management, the SetupWizard must be run as an Administrator.
Test Print
Once you have filled in all the above points, you can test the connection. To do this, open a command line in the /bin/ folder of the deliverable and start the SIEVERSPrintService.exe. If no error messages appear, everything is fine.
You can now perform a test print in Business Central. To do this, open the SIEVERS Print Virtual Printers page and open the desired printer. Via Actions -> Print Test Job, a test page is then printed on the desired printer.
Create Windows background service
To avoid having to start the service manually every time you restart Windows, you can create a Windows background service. This is conveniently done via the Services section in the SetupWizard. Click New..., select the desired appsettings file and the service will be registered automatically.
Alternatively, you can create the service via PowerShell with the following command. The credentials of the user under whose name the service is to be executed will be requested:
.\New-SIEVERSPrintService.ps1
Then open Services on your Windows system. Here you should find the service you just created under the name SIEVERS Print Service. Double click to open the dialog associated with this service. There you can start the service.
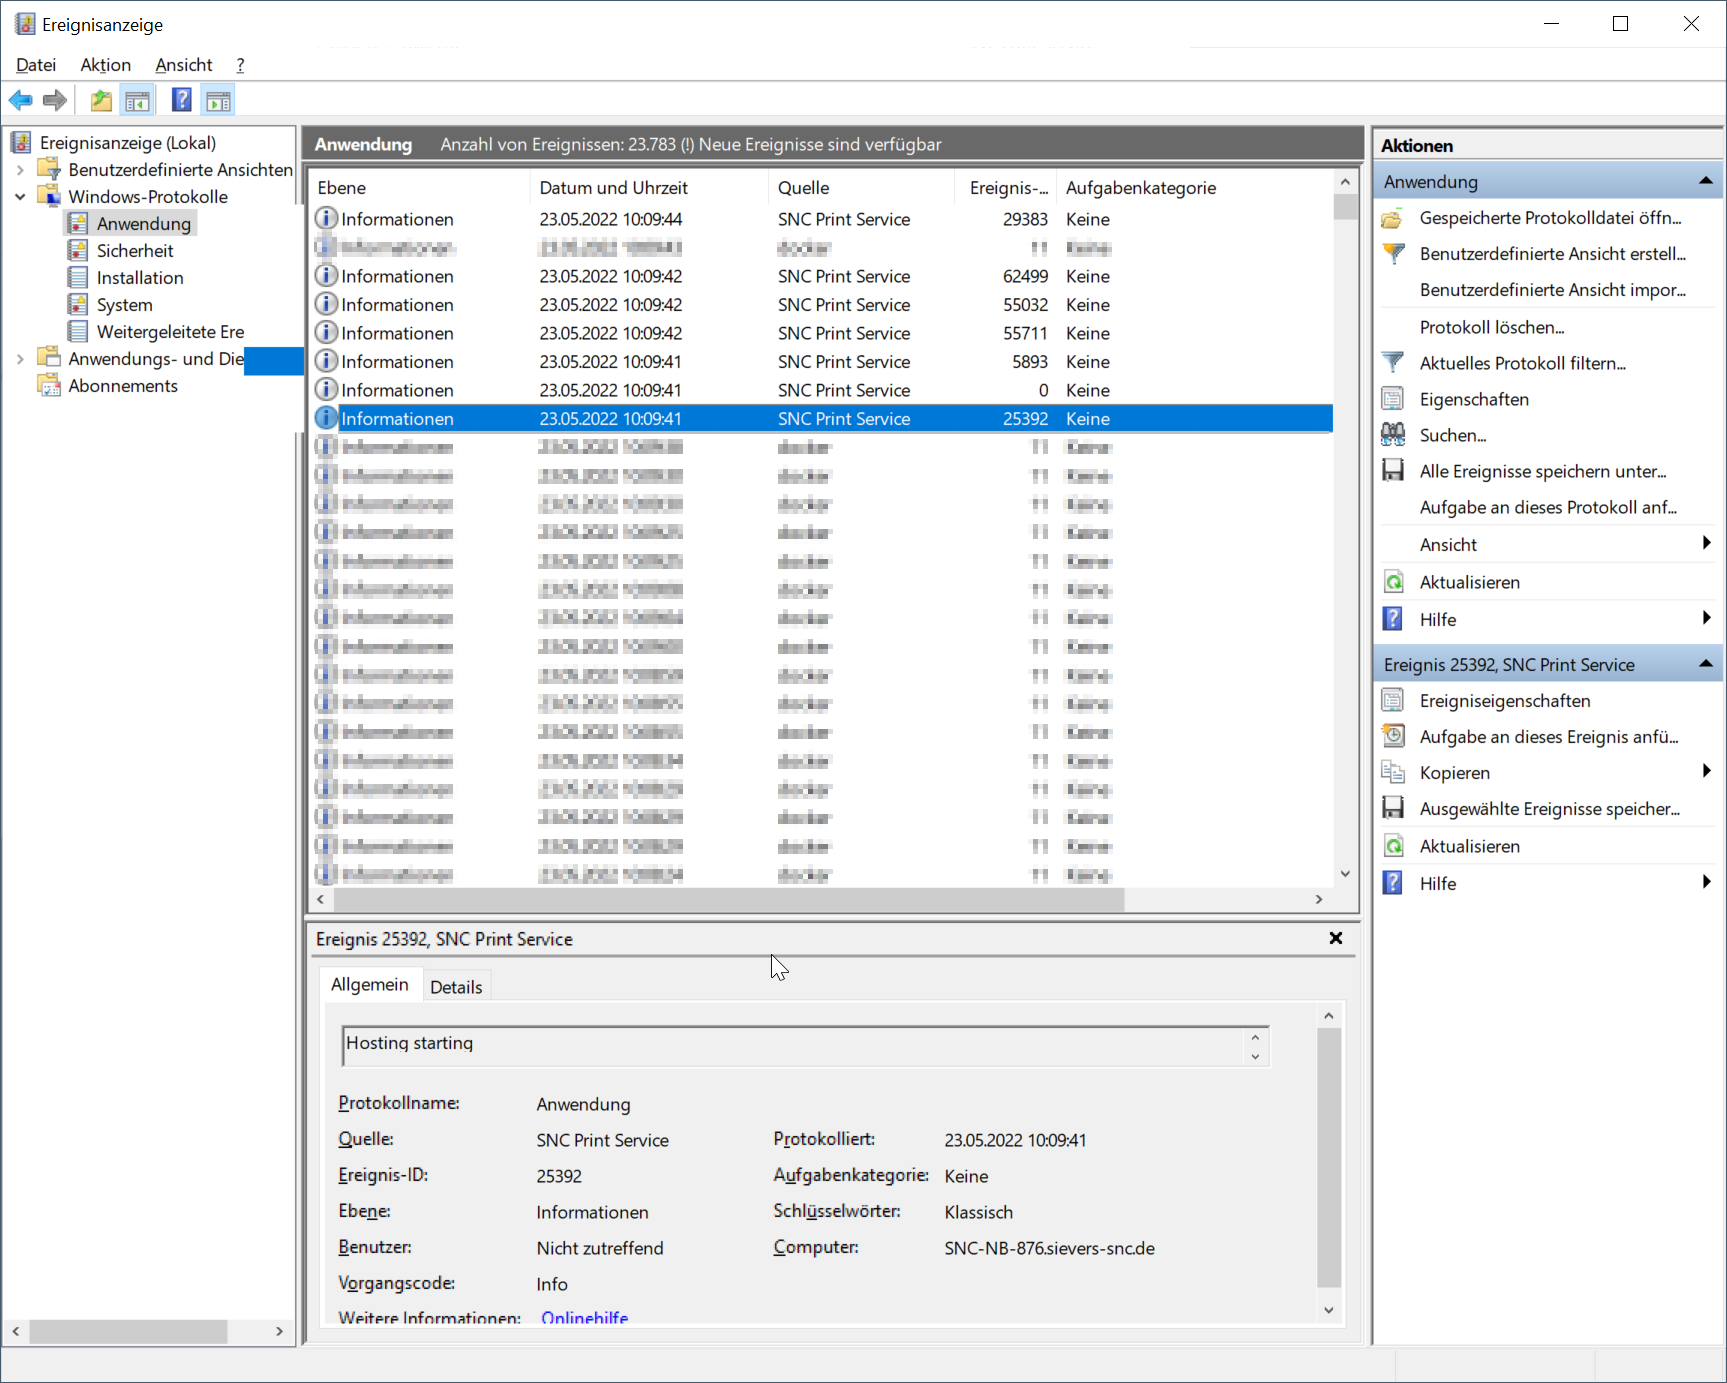
If everything worked, you will find the successful execution of the service in the Windows Event Viewer in the Applications section of the Windows logs.
If the execution was successful, you can set the startup type to Automatic in the General tab of the service.